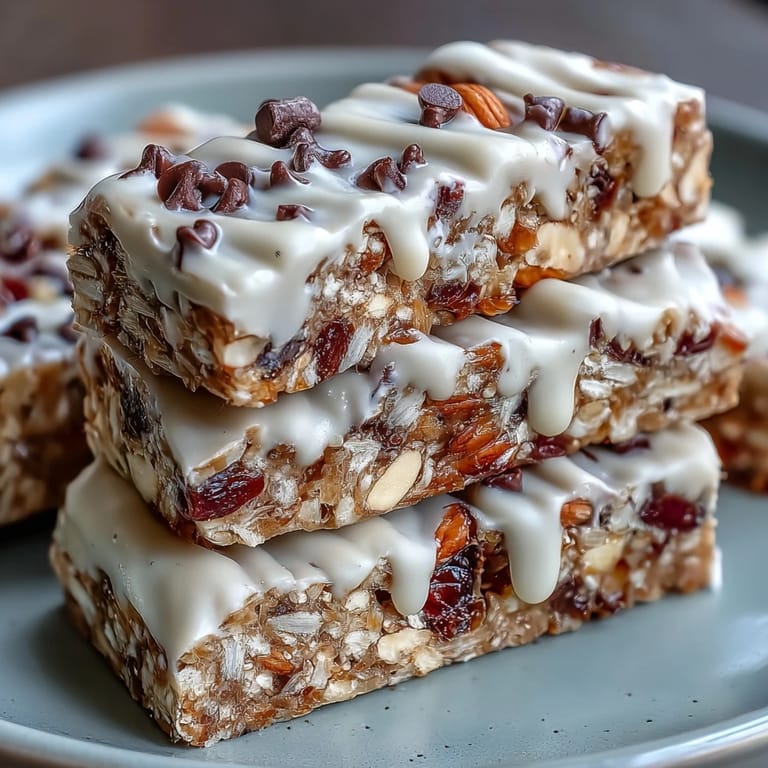
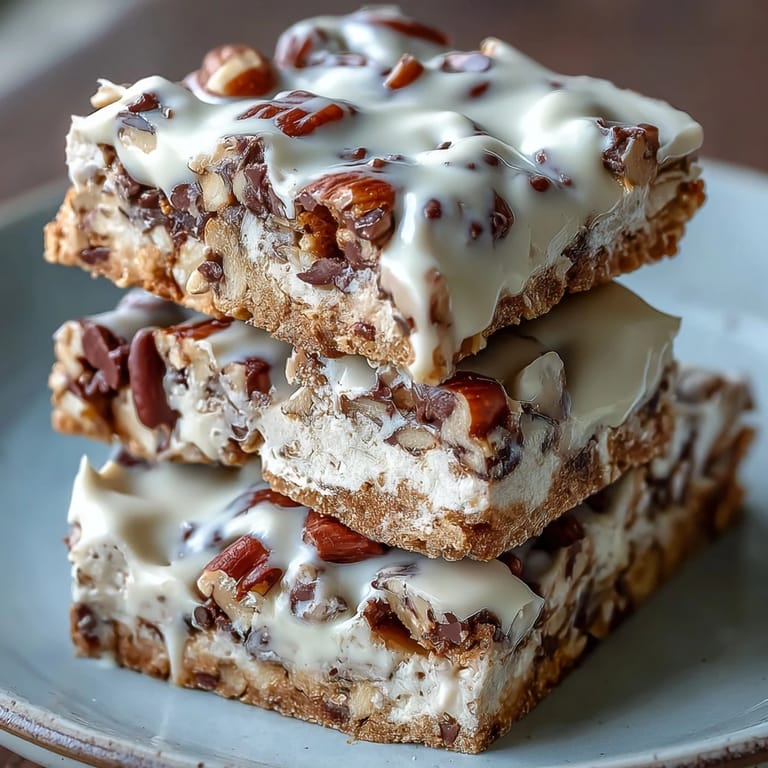
 Pin it
 I discovered these bars by accident one Tuesday morning when my protein powder was about to expire and I had a hankering for something sweet that wouldn't leave me feeling sluggish. What started as a desperate kitchen experiment turned into my go-to grab-and-go snack, and honestly, they taste so much like real cookie dough that my roommate accused me of cheating on my diet. The beauty of them is that they require zero baking, just five minutes of mixing and a patient refrigerator.
My friend Sarah came over one Saturday afternoon, stressed about prepping healthy snacks for the week, and I handed her one of these bars straight from the fridge. She took a bite, paused, and asked where I bought them from some fancy health food store, then felt genuinely betrayed when I admitted I made them in my kitchen using basic pantry ingredients. That moment made me realize these aren't just a personal win, they're the kind of recipe that converts skeptics.
Ingredients
- Almond flour: This is your textural foundation, giving you that crumbly cookie dough base that actually holds together, and it adds a subtle nuttiness that makes people think you used real butter.
- Vanilla protein powder: Whether you choose whey or plant-based depends on your diet, but make sure it's vanilla because chocolate would compete with the chocolate chips and honestly, vanilla lets the cookie dough flavor shine through.
- Natural almond butter: This is the moisture and binding agent rolled into one, and using the natural stuff without added oils gives you a cleaner taste, though peanut butter works just as well if you prefer that earthier flavor.
- Maple syrup: The sweetener that actually tastes like something, unlike some alternatives, and it adds a slight caramel note that elevates these beyond basic protein bars.
- Unsweetened almond milk: Just enough liquid to bring everything together without making the dough wet, and unsweetened keeps the focus on the real flavors rather than added sugar.
- Vanilla extract: A small amount goes a long way here, creating that cookie dough familiarity that makes people do a double take.
- Mini dark chocolate chips: Dark chocolate keeps the sugar content lower than milk chocolate while adding that nostalgic cookie dough experience we're chasing.
- Sea salt: This tiny pinch is the secret weapon that amplifies sweetness and makes the chocolate taste richer than it actually is.
Tired of Takeout? 🥡
Get 10 meals you can make faster than delivery arrives. Seriously.
One email. No spam. Unsubscribe anytime.
Instructions
- Set up your pan:
- Line your loaf pan with parchment paper and let it overhang the sides, because future you will be grateful for this when you're trying to lift out a dense bar without it crumbling everywhere.
- Build the dry base:
- Whisk together your almond flour, protein powder, and sea salt in a large bowl. This step ensures the protein powder is evenly distributed so every bite has that boost, not just the first bite.
- Bring it together:
- Add your almond butter, maple syrup, vanilla extract, and almond milk, then stir until the mixture starts coming together like a thick cookie dough. If it feels too sandy and won't hold together when you squeeze it, add almond milk one teaspoon at a time until it's workable.
- Fold in the chocolate:
- Gently mix in those mini chocolate chips so they're scattered throughout rather than clumping in one corner, which takes about thirty seconds of careful stirring.
- Press and set:
- Transfer the dough into your prepared pan and use a spatula to press it down firmly and smooth the top. You want it compact so the bars don't crumble when you cut them, and this pressing is where you really seal the deal on texture.
- Chill and set:
- Pop the whole pan into the refrigerator for at least an hour, though if you have time, longer is better because it helps the bars firm up and hold their shape when sliced.
- Slice with intention:
- Lift the dough out using the parchment overhang and place it on a cutting board, then use a sharp knife dipped in warm water to make clean cuts into eight bars. Warm water on the knife is the trick that keeps them from sticking and tearing.
- Store smart:
- Keep these in an airtight container in the refrigerator where they'll stay fresh and chewy for up to a week, or freeze them for longer storage and let them thaw for fifteen minutes before eating.
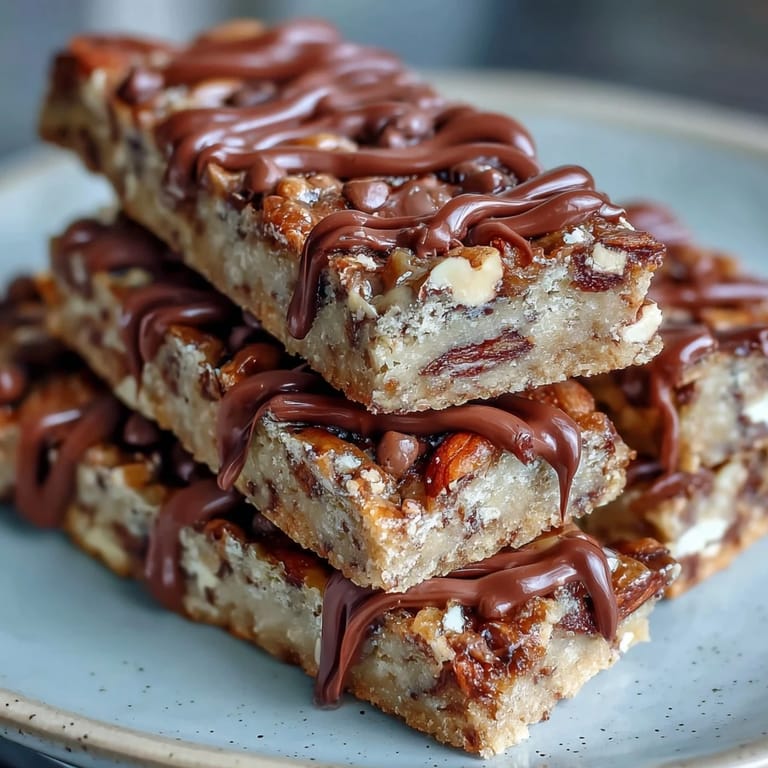 Pin it
 These bars have become my secret weapon for those afternoons when I'm starving at three o'clock and would normally reach for something that leaves me feeling guilty. Now I reach for one of these and feel like I'm treating myself while actually doing something good for my body, which might sound small but it's changed how I think about snacking entirely.
Customization Ideas That Actually Work
The basic recipe is solid, but what makes it fun is playing with add-ins based on what's calling to you that day. I've swapped the almond butter for peanut butter and added an extra tablespoon of cocoa powder to make them taste like a Reese's bar, and another time I added shredded coconut for a tropical twist that nobody expected. The protein powder is also your playground, so if you have chocolate or cookies and cream flavored powder sitting around, those work beautifully here too.
Making These Nut-Free or Allergy Friendly
If nuts are off limits for your household, swap the almond flour for oat flour and the almond butter for sunflower seed butter, and you'll get essentially the same result with a slightly different but equally delicious flavor profile. The oat flour creates a more tender crumb and the sunflower seed butter adds an earthiness that some people actually prefer, so it's not a downgrade, just a different direction. Always double check your chocolate chips and protein powder for allergens since those are the sneaky culprits in most recipes.
Why These Beat Store Bought Every Time
I used to buy those expensive protein bars from specialty shops, and they always tasted like they were engineered by someone who forgot what real food tastes like. Making these at home costs about a third of what I was spending, they taste infinitely better because you control every ingredient, and there's something satisfying about knowing exactly what went into something you're putting in your body. Plus, you can make them taste like whatever you want instead of settling for whatever the manufacturer decided was acceptable.
 Pin it
 These bars have become the recipe I make whenever someone asks me for healthy snack ideas, because they prove that eating well doesn't mean suffering through things that taste like cardboard. Keep a batch in your refrigerator and you'll find yourself reaching for them not because you have to, but because you actually want to.
Recipe Questions & Answers
- → Can I use other nut butters?
Yes, natural peanut butter works well, and for nut-free versions, sunflower seed butter is a great substitute.
- → How can I adjust sweetness?
Maple syrup provides natural sweetness, but honey can be swapped in according to taste preferences.
- → Is refrigeration necessary?
Refrigerating the bars for at least one hour helps them firm up and hold their shape for slicing and storage.
- → Are these bars suitable for vegetarians?
Yes, these bars fit a vegetarian diet when using plant-based protein powders or whey protein.
- → Can I add other mix-ins?
Absolutely, adding chopped nuts or shredded coconut enhances texture and flavor.