 Pin it
 As soon as the weather tips into that sticky, bare-feet-on-the-cool-tiles kind of heat, my kitchen becomes a playground for anything cold and sweet. This peanut butter banana ice cream came to life one impatient afternoon when those spotted bananas on the counter begged for something more exciting than banana bread. I was skeptical—could four ingredients really conjure up the creamy, scoopable ice cream I craved? But as the food processor whirred, the promise of a silky, peanutty treat started to fill the air. Watching it transform from frozen slices into a luscious swirl honestly felt a bit like kitchen magic.
The first time I made this, my roommate wandered in asking if I was baking cookies because the peanut butter smell was so comforting. She ended up sitting on the counter, stealing spoonfuls straight from the food processor. That was the first dessert we ever devoured together, chatting and laughing as the sun went down and the heat outside finally settled. It’s become our go-to for Friday evenings when effort is low and cravings run high.
Ingredients
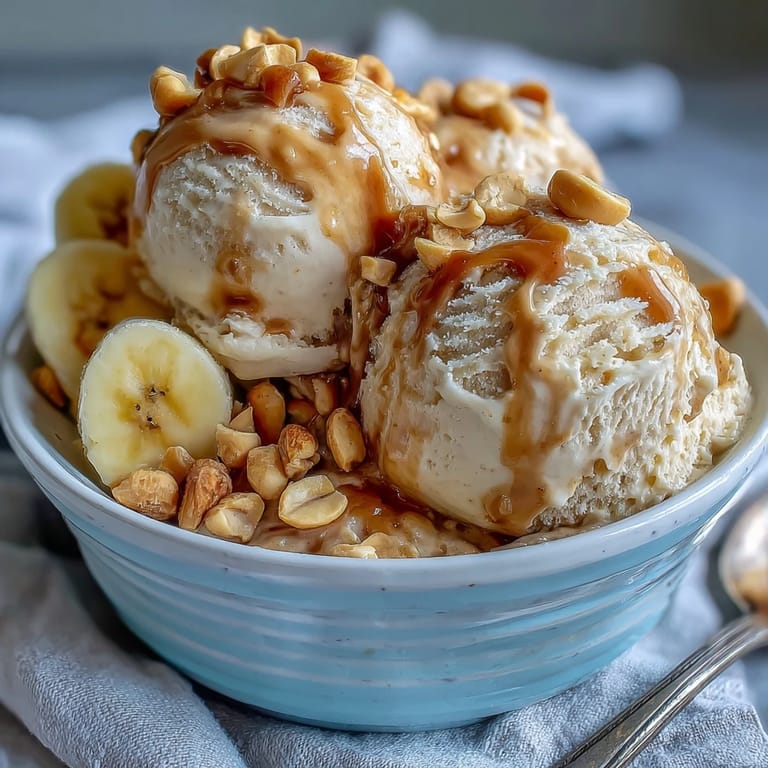
- Ripe Bananas: The riper the bananas, the more intense the sweetness and creamier the finished ice cream. I’ve learned that bananas with almost leopard-like spots are best, not green or underripe.
- Creamy Peanut Butter: Opt for natural, unsweetened peanut butter for a rich nutty flavor and silky texture—avoid the chunky kind, or you’ll end up with a grainy swirl.
- Maple Syrup: Just a drizzle rounds out the flavors, and you can skip or swap in honey if you like it less sweet, but I always recommend tasting before adding.
- Vanilla Extract: A splash lifts the whole mixture and adds those nostalgic ice cream shop vibes—don’t skip it, even if it seems minor.
Tired of Takeout? 🥡
Get 10 meals you can make faster than delivery arrives. Seriously.
One email. No spam. Unsubscribe anytime.
Instructions
- Freeze the Bananas:
- Lay sliced bananas on a parchment-lined baking sheet, tucking them in so no edges touch—otherwise, they freeze together and make blending tougher later.
- Blend Everything Together:
- Drop the solid banana slices into your food processor with peanut butter, maple syrup, and vanilla, then process; pause a few times to scrape the sides, and don’t worry if it looks crumbly at first—it’ll smooth out like soft-serve magic.
- Decide Your Texture:
- If you love soft-serve, serve immediately; for scoopable, classic ice cream, spread the mixture in a loaf pan and freeze for another hour or two until firm.
- Scoop and Savor:
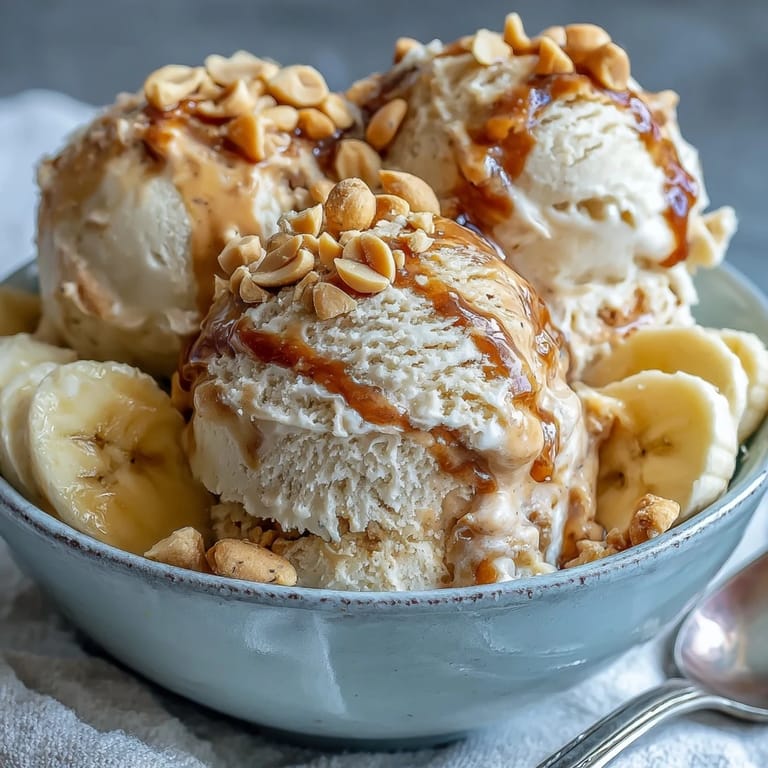
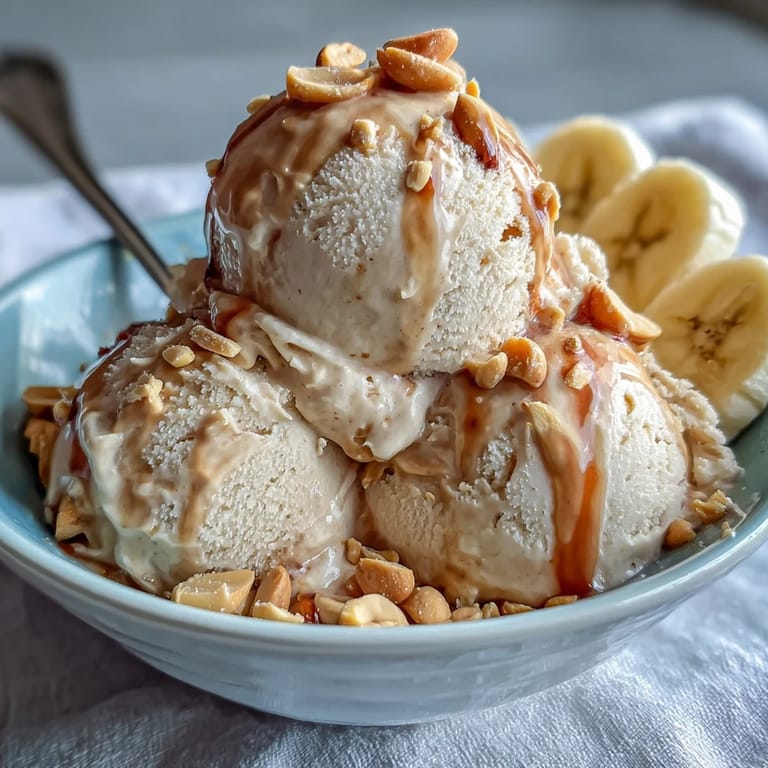
- Use a warm scoop for perfect rounds and serve as is, or jazz it up with favorite toppings.
 Pin it
 This ice cream officially became more than just a treat on a sticky summer night when my nephew, typically ice-cream-averse, asked for seconds with a face covered in peanutty smears. There was something so satisfying about everyone digging into a bowl that tasted decadent but was secretly packed with fruit.
No-Churn Means No Stress
What I love most is that you don’t need any fancy machines. As long as you’ve got a sturdy blender or food processor, you’re set—no churning, just blend, freeze, and enjoy.
Customizing For Cravings
Every time I make this, I try something new: a handful of mini chocolate chips, a swirl of raspberry jam, or a sprinkle of toasted coconut. It’s endlessly adaptable, so don’t be afraid to make it your own each time.
Serving and Storage Tips
If you like your ice cream firmer, let it sit out for a couple minutes before scooping so it’s not rock hard, especially straight from the freezer. Sometimes I’ll prep a batch in the afternoon and serve it later at dinner, and it’s always a hit at the table.
- Keep leftovers in an airtight container to avoid icy crystals.
- Let it thaw briefly for the perfect scoop.
- Layer with fresh fruit for a more decadent sundae experience.
 Pin it
 I hope you find as much joy in this breezy, peanut butter-infused dessert as we have—it turns those end-of-the-week, too-hot-to-cook moods into a sweet highlight. Here’s to ice cream that’s easy, healthy, and never needs a reason.
Recipe Questions & Answers
- → How do I get a creamy texture?
Use fully frozen banana slices and a high-powered blender or food processor; pulse, scrape the sides, and blend until smooth and airy. For a firmer scoopable finish, freeze an extra hour after blending.
- → Can I substitute the peanut butter?
Yes—almond or cashew butter are great swaps. Use the same amount and adjust sweetness or salt to taste. Different nut butters may change creaminess and mouthfeel slightly.
- → Is added sweetener necessary?
Ripe bananas supply most of the sweetness. Add 1–2 tablespoons of maple syrup or honey if bananas are underripe or you prefer a sweeter result.
- → How should I store leftovers?
Pack into a freezer-safe container and press plastic wrap onto the surface to minimize ice crystals. Keep frozen up to two weeks; let soften 10–15 minutes before scooping.
- → When should mix-ins be added?
Fold in chocolate chips, chopped nuts or fruit after blending, then freeze briefly to set. For swirls, gently ripple in melted chocolate before the final freeze.
- → What are good serving ideas?
Serve as a soft-serve straight from the blender or scoop after an extra freeze. Top with sliced banana, a drizzle of melted chocolate, or crunchy nuts for contrast.