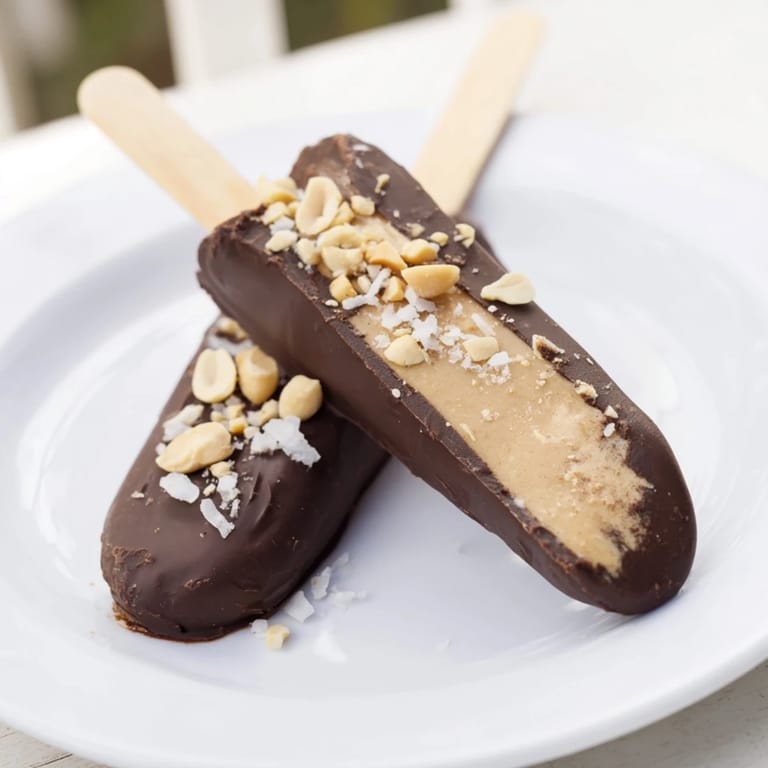
 Pin it
 I started making these on Sunday afternoons when I needed something quick that felt like a real dessert without turning on the oven. The first batch disappeared before they even froze solid. My youngest pulled one out after thirty minutes, chocolate still soft, and declared it the best thing I ever made. Now I keep a tray in the freezer year-round because they vanish fast.
I remember bringing these to a backyard cookout one July, stacking them in a cooler with ice packs. People kept asking if I ordered them from some fancy dessert shop. I just smiled and said I threw them together that morning. One friend grabbed three before the burgers were even done. That night I texted her the recipe and she made them the next day.
Ingredients
- Ripe bananas: Look for yellow peels with a few brown spots, they freeze creamier and taste sweeter than firm green ones.
- Creamy peanut butter: The regular kind works best here, natural peanut butter can slide off when frozen because the oils separate.
- Dark or milk chocolate: I use whatever I have, dark feels less sweet and balances the banana, milk chocolate makes kids happier.
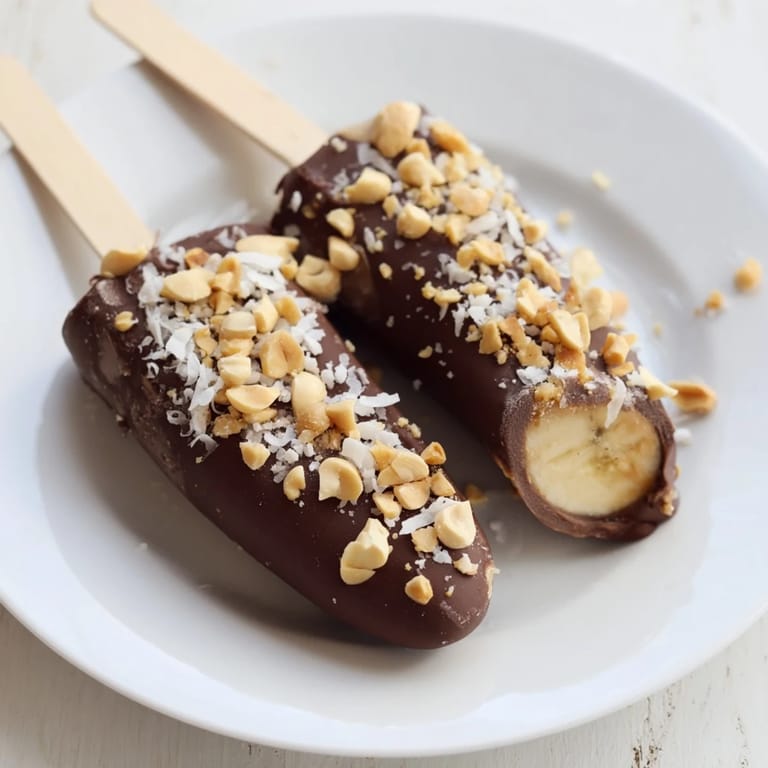
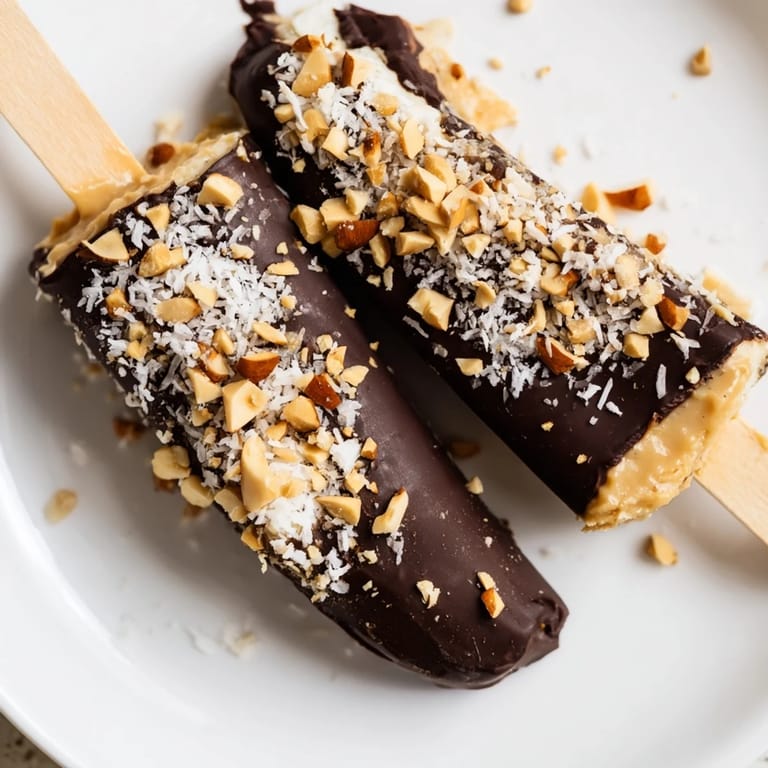
- Chopped roasted peanuts: A little crunch against the smooth peanut butter is magic, toast them lightly if they taste flat.
- Shredded coconut: I like the big flakes, they stick better and add a tropical note without overpowering anything.
- Mini chocolate chips: They nestle into the melted coating and give you bonus chocolate in every bite.
- Sprinkles: Pure fun, no other reason needed, kids pick the colors and go wild.
Tired of Takeout? 🥡
Get 10 meals you can make faster than delivery arrives. Seriously.
One email. No spam. Unsubscribe anytime.
Instructions
- Prep the bananas:
- Peel and slice each banana in half across the middle, then slide a popsicle stick into the cut end until it feels secure. Lay them on a parchment-lined tray so they do not touch and freeze for an hour until they feel solid.
- Add the peanut butter layer:
- Pull the tray from the freezer and spread a tablespoon of peanut butter over each banana half using a small spatula or the back of a spoon. Smooth it out fast because the cold banana firms it up quickly, then freeze another fifteen minutes.
- Melt the chocolate:
- Chop the chocolate into small pieces and melt it in a heatproof bowl over barely simmering water, stirring until glossy. If you use the microwave, go in thirty-second bursts and stir between each one so it does not seize.
- Coat and decorate:
- Dip each frozen pop into the melted chocolate, twirl it gently to cover everything, then let the excess drip back into the bowl. Sprinkle your toppings on immediately before the chocolate hardens.
- Final freeze:
- Set the finished pops back on the parchment and freeze for at least an hour. The chocolate should snap when you bite through it.
 Pin it
 One winter evening I made a batch with my neighbor and her daughter. We lined up all the toppings in little bowls and let the kid design each pop like a tiny work of art. She made one with only sprinkles, another with coconut and peanuts in stripes. When we pulled them out the next day she handed them out like awards. That tray lasted less than two days.
Choosing Your Chocolate
I have tried every kind and here is what I learned. Dark chocolate with around seventy percent cocoa tastes grown-up and balances the sweetness of the banana and peanut butter. Milk chocolate makes it feel more like candy, which is exactly what kids want. White chocolate is fun for a change but it sets softer and can melt on your fingers faster. Sometimes I mix dark and milk together for something in between.
Topping Combinations That Work
You can go classic with chopped peanuts for crunch or shredded coconut for chewiness. I like mixing mini chocolate chips with sea salt for a sweet-salty contrast. Crushed pretzels add unexpected texture and a hint of salt. Freeze-dried strawberries or raspberries bring bright color and a tart note. My favorite is peanuts and coconut together, it tastes like a candy bar but better.
Storage and Serving Tips
These keep beautifully in the freezer for up to a week if you stack them in an airtight container with parchment between the layers. Pull them out and let them sit on the counter for two or three minutes if you want the banana a little softer. Serve them straight from the freezer on hot days or after dinner when you want something cold and sweet without any guilt.
- Swap peanut butter for almond butter or sunflower seed butter if allergies are a concern.
- Drizzle extra melted chocolate over the tops in zigzag lines for a fancier look.
- Roll them in crushed graham crackers for a s'mores vibe without the campfire.
 Pin it
 Every time I make these I remember how simple things can become the best things. You do not need fancy equipment or hard-to-find ingredients, just a little time and a freezer. They always make people smile.
Recipe Questions & Answers
- → How do you prevent the chocolate from melting the banana?
Freezing the banana halves until firm before dipping helps keep the chocolate from melting the fruit and ensures a crisp coating.
- → Can I use different toppings on these pops?
Yes, toppings like chopped peanuts, shredded coconut, mini chocolate chips, or sprinkles add texture and flavor variety.
- → Is it possible to make a nut-free version?
Substitute peanut butter with sunflower seed butter to avoid nuts while maintaining a creamy layer.
- → What type of chocolate works best for coating?
Both dark and milk chocolate melt well, offering either a rich or sweeter flavor profile. White chocolate is a tasty alternative.
- → How long should the pops be frozen after coating?
Freeze the chocolate-coated pops for at least one hour to fully set the chocolate and keep the treat firm.